
Trusted By Over 250,000 Customers!
No Interest, No Payments for 12 months on Select Products
No Interest, No Payments for 12 months on Select Products
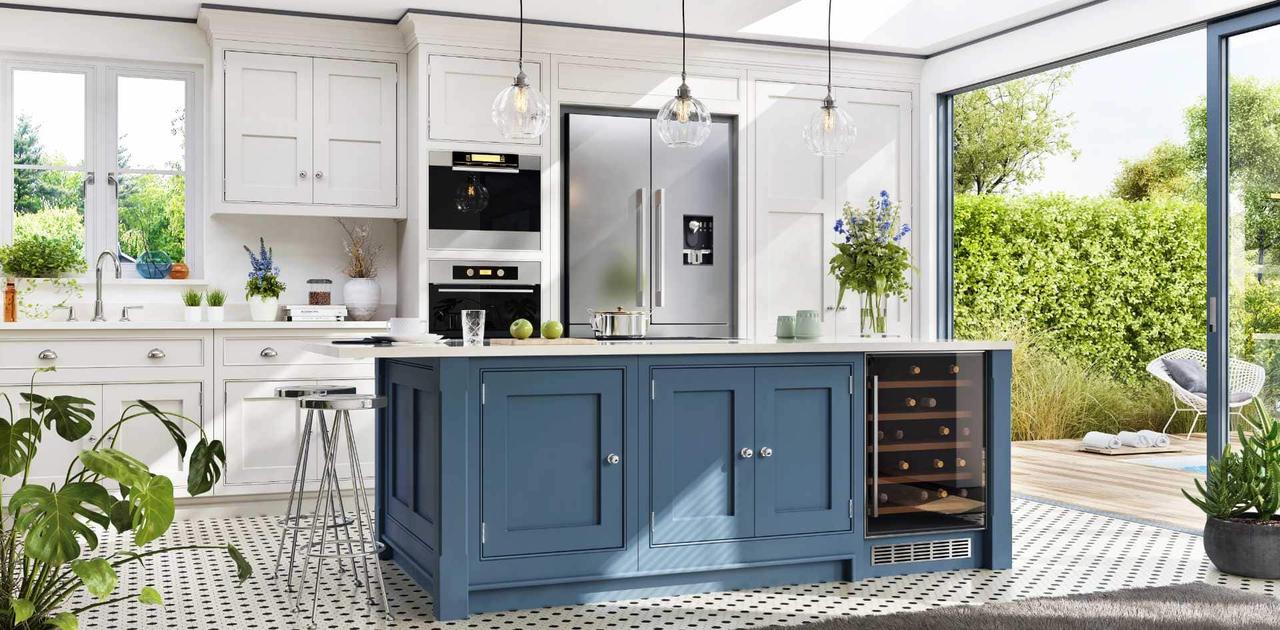
White kitchen cabinets show everything. That’s part of the tradeoff when you choose them. That brightness and the visibility come as a package. Most of the time, the right cleaning approach handles it. But some yellowing doesn’t respond to cleaning no matter what you use, and knowing the difference saves a lot of wasted effort.
This guide covers how to clean white cabinets thoroughly, what causes yellowing in the first place, and how to tell when a deeper solution is the right call.
Not all yellowing has the same cause, and the cause determines whether cleaning will work.
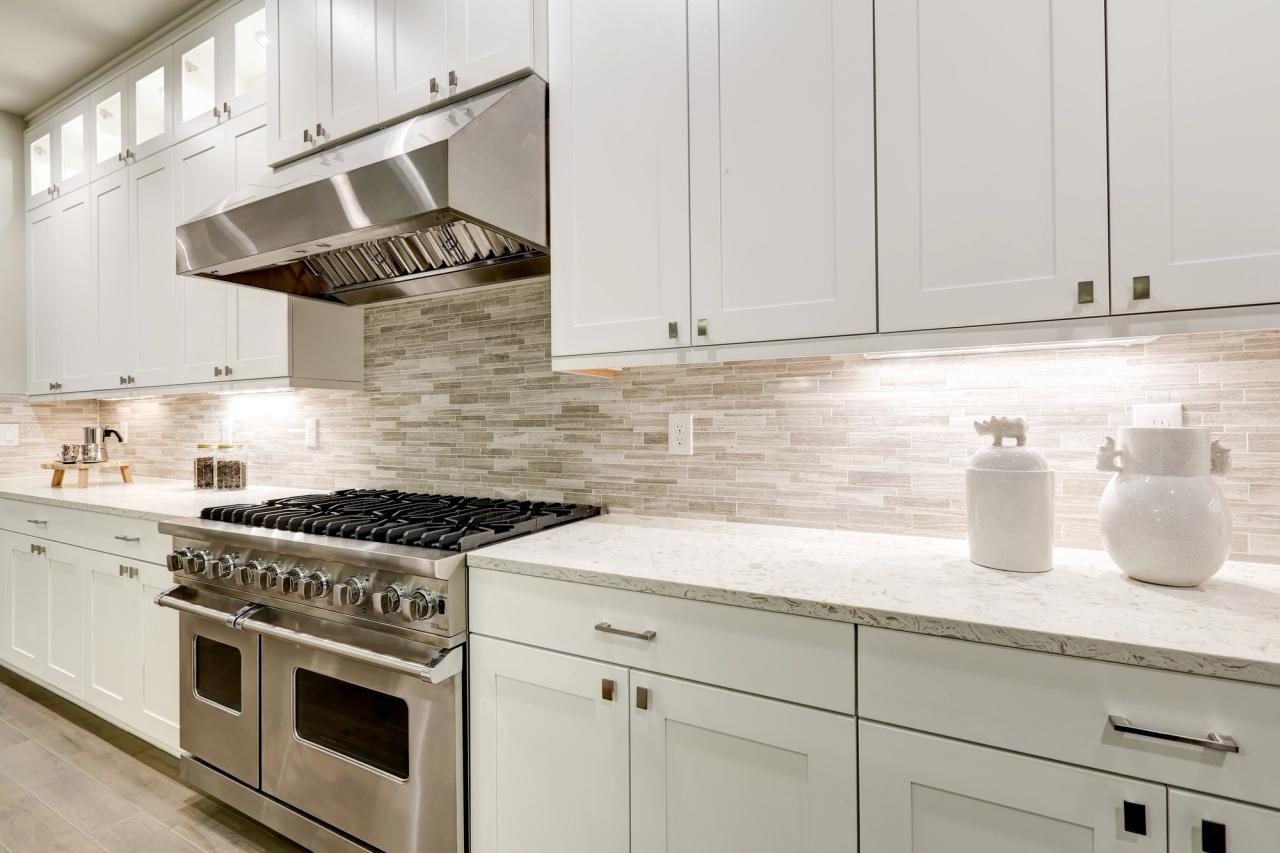
Grease and steam buildup is the most common culprit. Cooking releases airborne grease particles that settle on cabinet surfaces and harden over time. The cabinets nearest the stove and above the dishwasher accumulate the most. This type of yellowing sits on the surface and responds well to the right cleaning approach.
UV exposure affects cabinets that get direct sunlight. UV rays break down the finish on painted or laminate cabinets over time, causing the surface itself to discolor. Counterintuitively, cabinet interiors and shaded areas often yellow faster than sun-exposed surfaces — UV light actually breaks down yellowing compounds in some finishes. When UV damage is the cause, the discoloration is in the material, not on it.
Oil-based paint oxidation affects cabinets finished with oil-based paints. These paints react with oxygen over time, producing a yellow tint that develops gradually and tends to appear most in low-light areas. This is a chemical change in the paint itself and cannot be cleaned off with any amount of scrubbing.
Age and material quality play a role in all cabinet types. Thermofoil vinyl degrades with heat exposure. Lower-grade laminates lose their protective layers faster. Factory finishes with clear varnish topcoats can yellow independently of the base paint underneath, giving everything a warm, aged tone even when the white beneath is still intact.
Start with the gentlest method and work up from there. Aggressive cleaning on cabinets that only need a light wipe-down can dull the finish and make surfaces more prone to future staining.
For routine upkeep, a dry or lightly dampened microfiber cloth handles dust, fingerprints, and light smudges without any product at all. Wipe down cabinet faces and handles weekly. Pay attention to the edges and corners where grease accumulates in the profile detail — a soft-bristled toothbrush with a mild cleaning solution can reach those spots without scratching.
The single most effective habit for white cabinets is wiping up spills and splashes immediately. Spaghetti sauce, coffee, red wine, and cooking oils all stain faster on white than on any other color, and dried residue is significantly harder to remove than fresh.
For grease that has accumulated over time, a diluted dish soap solution is your first line of attack. Mix one part mild dish soap with two parts warm water. Apply with a soft sponge, working from top to bottom to avoid streaks. Rinse with a clean damp cloth and dry immediately; leaving moisture on the cabinet surface can cause warping or seam damage over time, particularly on laminate and thermofoil.
For heavier grease buildup, a 50/50 mix of white vinegar and warm water cuts through residue without damaging most painted or laminate finishes. Spray onto a cloth rather than directly onto the cabinet surface, wipe in the direction of any grain or texture, and rinse thoroughly. Test on an inconspicuous area first! Vinegar is acidic and can affect some finishes.
Avoid ammonia-based cleaners on painted cabinets. Ammonia reacts chemically with oil-based and alkyd paints and can accelerate the discoloration you’re trying to fix.
For stains that haven’t responded to dish soap or vinegar, a baking soda paste often works. Mix three parts baking soda with one part water to form a thick paste. Apply to the stained area with a soft cloth, rub gently in small circular motions, and let it sit for ten minutes before wiping clean. The mild abrasive action lifts trapped grime without scratching the finish.
For surface yellowing that appears to be grime-based, meaning it’s concentrated near the stove, feels slightly tacky, or has a clear pattern matching your cooking habits, hydrogen peroxide applied with a cloth can lighten the discoloration. Use 3% hydrogen peroxide (standard drugstore concentration), blot rather than scrub, and rinse well. As with vinegar, test first on a hidden surface.
Avoid magic erasers on painted cabinets entirely. They function as very fine sandpaper and will strip protective coatings and dull the finish, creating micro-scratches that trap grime faster going forward.
Surface buildup — grease, dust, cooking residue — responds to cleaning. The methods above will handle most of what accumulates on white cabinets through normal kitchen use.
What cleaning cannot fix is discoloration that has reached the material itself. If the yellowing is in the finish rather than on it, no cleaner will reverse it.
Here are the signs you’re dealing with that situation:
At this point, you’re not dealing with a cleaning problem. The finish has degraded and the cabinet surface needs to be replaced, not cleaned.
Cabinet refacing replaces the visible surfaces of your existing cabinet boxes, including the doors, drawer fronts, and the face frames, with new material while keeping the underlying structure in place. The result is a kitchen that looks new at a lower cost and less disruption of a full cabinet replacement. Modern refacing materials are specifically engineered to resist the grease, heat, and moisture that degrade older laminate and paint finishes.
If you’re interested in why we recommend cabinet refacing above alternatives in many cases, the cabinet refacing vs. refinishing vs. replacement guide breaks down the cost, scope, and use case for each option.
Cleaning handles most of what white cabinets accumulate over time. When it doesn’t, the problem is usually in the material rather than on it, and no amount of scrubbing changes that.
If your cabinets are past the point where cleaning makes a difference, Renuity’s kitchen specialists can walk you through what refacing would look like for your space. Browse our kitchen cabinet refacing service or schedule a free in-home consultation with no obligation to purchase.

As a content manager at Renuity, Francheska spent nearly two years helping homeowners discover the possibilities of transforming their spaces. Renuity is a leader in home remodeling, specializing in everything from windows and doors to bathrooms and home storage solutions, and she’s proud to be part of a team that prioritizes quality, innovation, and customer satisfaction. She graduated from Florida International University with a double major in International Business and Marketing, ranked among the top programs in the nation. Her passion for home improvement runs deep—since childhood, she’s been inspired by watching HGTV and seeing the magic of remodels come to life. Now, she channels that passion into connecting readers with ideas, tips, and solutions to create homes they love.
Renuity is backed by top industry ratings and trusted by homeowners nationwide for quality, service, and reliability.


Offer expires:
plus 12 months, no interest,no or low monthly payments
claim offer
Get a free, no-obligation estimate and see how easy it is to upgrade to your dream home. One of our local specialists will reach out to schedule your consultation—on your terms.
At Renuity, our greatest pride comes from the trust homeowners place in us and the lasting results we deliver. From seamless installations to transformative home upgrades, we’re committed to making every project simple, stress-free, and built to last. Our family of regional brands includes some of the most respected names in remodeling nationwide, all united by proven expertise and a shared commitment to exceptional service. See how we’ve made a difference for families nationwide and what they have to say about their experiences with Renuity.

Great window company and competitors when it comes to quality and cost.
We signed up to replace 8 windows and the team of Brian and Joe, came early and performed the removal and installation very professionally and with great care. They worked very hard and left the work ...
The Renuity Team was professional and highly experienced in the services they provided. We were extremely satisfied with our shower installation and they worked closely with us to incorporate keeping ...
Extremely helpful and pleasant with both presentation of products and pricing. Made the whole experience easy to understand and made both my husband and I feel very confident with the project for our ...
Great work and Awesome service! I am truly happy that we found Reunity! Thank you and God Bless!
If I could give more than 5 stars I would! Darien and his team from Renuity did such a wonderful job installing my new windows today! I can’t believe the difference these new windows made to my home. ...
Vincent Sr. - professional, thorough, ensured everything was good and we had all the info we needed before he left. 10/10, will absolutely call again when we're ready to do more windows. The windows t...
Andrew McClary was amazing. Very easy to work with and straightforward. These are often stressful conversations & we felt confident moving forward from the go! Excited for our new shower!!!
The overall experience to install new window from start to finish was awesome. Gregory and Julian came in instantly covered everything in the house with plastic. They were professional very polite. Th...
Dedication to the project from the beginning of the designing to finalizing installation from start to finish and we were completely impressed with the finished project!


