
Trusted By Over 250,000 Customers!
No Interest, No Payments for 12 months on Select Products
No Interest, No Payments for 12 months on Select Products
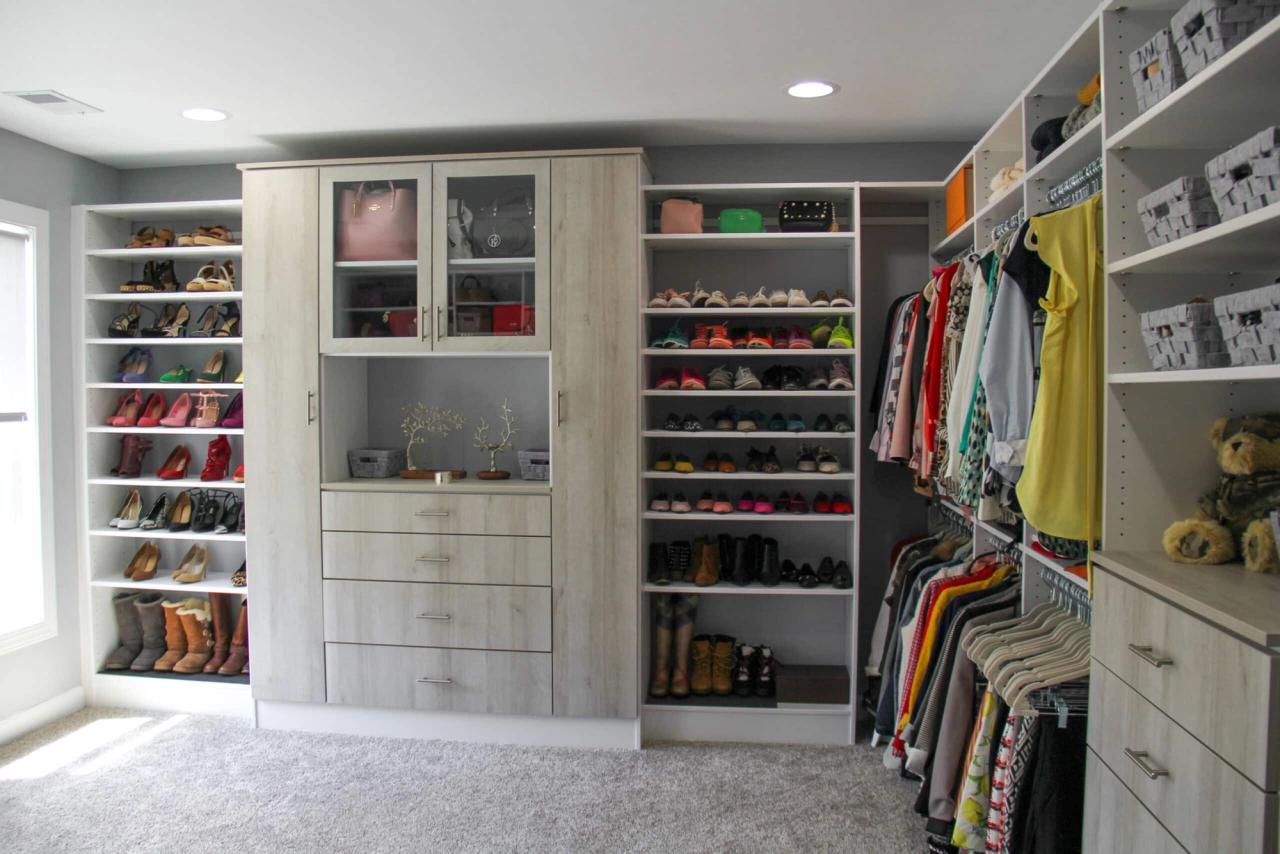
If you’ve ever dreamed of having a spacious, organized closet to house your wardrobe, turning a spare bedroom into a custom closet might be the solution you need. This transformation not only enhances your home’s functionality but also adds a touch of luxury to your daily routine. Whether you’re a DIY enthusiast or looking to hire professionals for the job, this guide will walk you through the key steps, practical tips, and important considerations.
Designing the layout is one of the most critical steps in turning a bedroom into a closet. A good layout combines function and aesthetics.
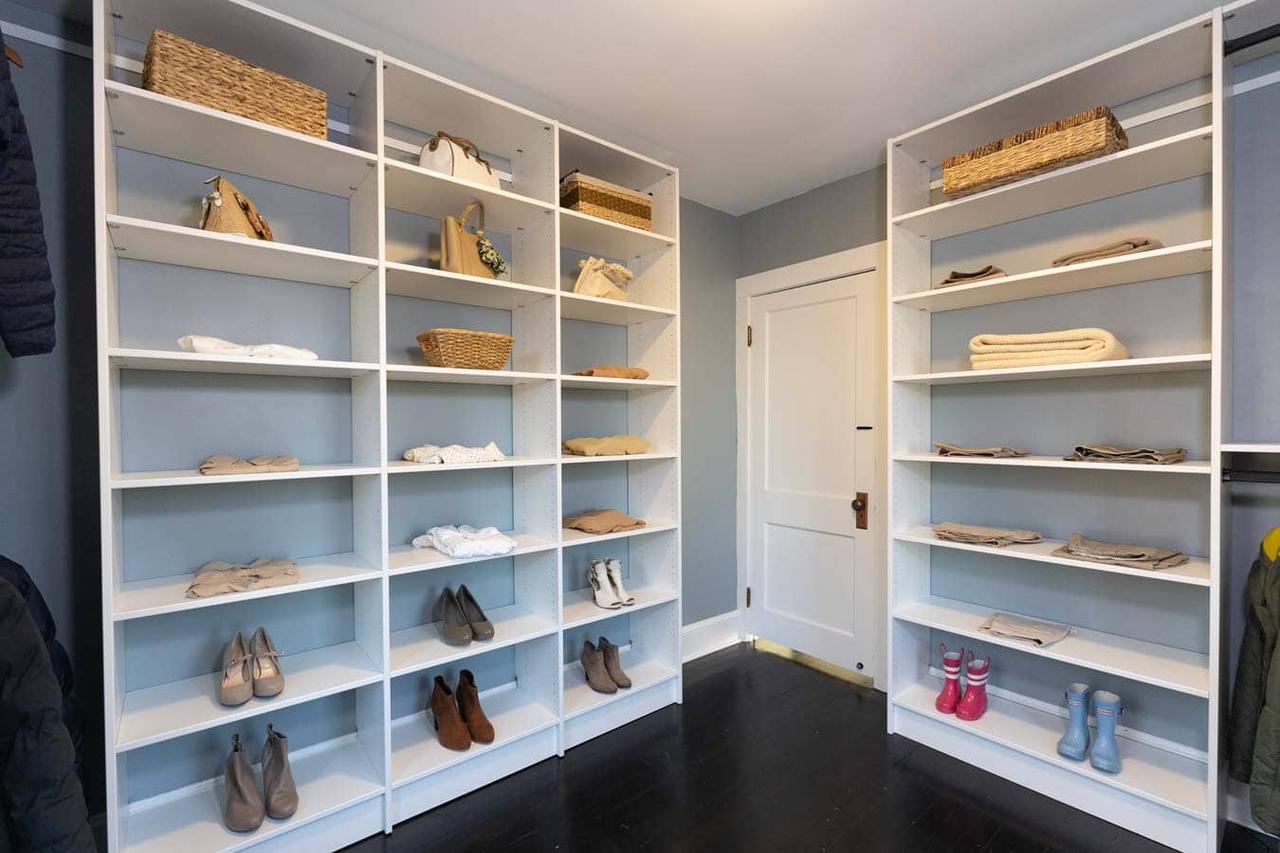
Sketch out your plan or use closet design software to experiment with different configurations. For more tips and answers to common questions about designing custom closets, check out our Custom Closets FAQs.
Before installation begins:
For complex layouts or high-end features, consider hiring a professional service like Renuity. We specialize in custom storage solutions, ensuring every detail is optimized for your needs.
The final step is organizing your belongings in a way that maximizes usability.
While a DIY approach is feasible for smaller or simpler projects, some situations call for professional expertise:
Renuity specializes in custom closet systems that maximize space and style. Their team can help you design and build a closet that fits your needs perfectly.
Once your closet is complete, keep it in top shape with these tips:
Turning a spare bedroom into a custom closet is an exciting project that offers both practical and aesthetic benefits. By carefully planning your layout, selecting the right storage systems, and adding thoughtful features, you can create a functional and stylish space tailored to your needs. Whether you’re doing it yourself or working with professionals like Renuity, this transformation will elevate your home and simplify your daily routine.
With the right approach, your dream closet is within reach — start planning today!

As a content manager at Renuity, Francheska spent nearly two years helping homeowners discover the possibilities of transforming their spaces. Renuity is a leader in home remodeling, specializing in everything from windows and doors to bathrooms and home storage solutions, and she’s proud to be part of a team that prioritizes quality, innovation, and customer satisfaction. She graduated from Florida International University with a double major in International Business and Marketing, ranked among the top programs in the nation. Her passion for home improvement runs deep—since childhood, she’s been inspired by watching HGTV and seeing the magic of remodels come to life. Now, she channels that passion into connecting readers with ideas, tips, and solutions to create homes they love.
Renuity is backed by top industry ratings and trusted by homeowners nationwide for quality, service, and reliability.


Offer expires:
plus 12 months, no interest,no or low monthly payments
claim offer
Get a free, no-obligation estimate and see how easy it is to upgrade to your dream home. One of our local specialists will reach out to schedule your consultation—on your terms.
At Renuity, our greatest pride comes from the trust homeowners place in us and the lasting results we deliver. From seamless installations to transformative home upgrades, we’re committed to making every project simple, stress-free, and built to last. Our family of regional brands includes some of the most respected names in remodeling nationwide, all united by proven expertise and a shared commitment to exceptional service. See how we’ve made a difference for families nationwide and what they have to say about their experiences with Renuity.

Great experience all around. Salesperson was knowledgeable and friendly. installation team was on time, cleaned up after themselves and did a great job. Sheetrock guy was excellent as well.
We had our garage floor finished by Brendon,Markus, Alex R. They did an amazing job everything to our liking, and I'm very picky. 10 outta 10
My finished Guest Bath Renovation is above and beyond my expectation! Darrell and Alex never wasted a minute removing sliding glass doors over clostrophobic space with metal hazardous entry and exit f...
This company blew it out of the park in every aspect. So professional with the first meeting discussing the cabinets and what to get and everything, and then with the man who came to measure, the cabi...
We are very happy we the work that Renuity company did at our house (kitchen area and bathroom) Definitely, we are going to continue working with them in the near future! Very professional people!! Th...
I had Renuity install a walking shower at my house. I had a very good experience with the service. They enlarged the area without compromising the quality and appearance. I find myself visiting the wa...
We signed up to replace 8 windows and the team of Brian and Joe, came early and performed the removal and installation very professionally and with great care. They worked very hard and left the work ...
We would like to recognize the outstanding service provided by Buck Flowers. He is professional, knowledgeable, and extremely attentive throughout the entire process. He took the time to understand ou...
Professional, excellent quality and workmanship, safer, updated, easy to maintain shower for a Senior. I opted for a safety bar, built in storage, built in seat.
The Renuity Team was professional and highly experienced in the services they provided. We were extremely satisfied with our shower installation and they worked closely with us to incorporate keeping ...


